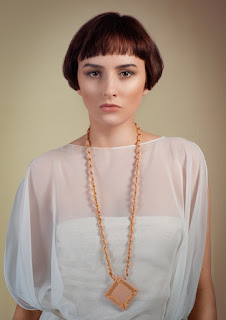
I am often asked how I emphasize eyes in my
portraits. We are all taught that in a portrait the eyes are what draw the
attention of the viewer. So how do we achieve this and still make it look
natural. Well, the answer lies in the detail and the attention that needs to be
given.
Some tutorials promote the use of
sharpening which might be fine if properly done but if over done or set against
over blurring of the face just makes everything look exaggerated. For me this
is about the worst thing you can do.
In another blog I will deal with how I
tackle skin smoothing and toning, which only must be done selectively, but for
the time being here is my workflow for the eyes.
First, make sure you have a correctly
exposed image in camera. I don’t use spot metering for this, but centre
metering would be fine. And, of course, the lighting should be enough to get a
good exposure with catchlights showing.
Loaded into Photoshop the process is as
follows (note I have a number of actions set up to help speed it up and this is
always advisable).
The whites
of the eyes (which are in reality off-white, sometimes
cream, with different shading across the area, and often with some veins
showing.)

- Add a new
layer on top of the image by going to Layer-New and calling it Eye Whites.
- Expand
the image to 100% and examine for colour, shading and any veins or marks.
- Take the
Clone Stamp Tool, set the brush mode to Lighten (clones out only parts
darker than the sample area), the Hardness slider mid-way, and Opacity
about 20%.
- To remove
veins or other darker marks set the brush size to the width of the vein or
mark, sample from alongside it and brush along the marks until gone. Any
overly light marks do the same but with the brush mode set to Darken. Any
dark cream areas or greatly contrasted areas repeat with the brush mode at
Lighten sampling from adjacent areas but don’t overdo it because you must
still show some variable shading across the whites of the eyes.
The Irises (emphasizing colour and contrast)
- Add a
second layer and call it Dodge and Burn Irises.
- Fill it
with 50% Gray by going to Edit-Fill and in the Contents Use drop down box
select 50% Gray. Set the mode of the layer to Soft Light.
- Expand
image to 100%
- Take the
Burn Tool, set the Range to midtones, the brush opacity to about 6% and
medium soft hardness again, and gradually darken the outside rim of the
iris and also just around the centre. Sometimes the lower half is darker
than the upper half.
- Similarly,
change to the Dodge Tool, and with the same settings as for the Burn Tool lighten
the inner coloured part to bring out the colour of the eyes and give it a
boost.
- If any of
this is overdone then use the Eraser Tool at about 6% opacity and gradually
reduce back.
make the
eyes gleam
- Expand
image to 100%
- Take the
Lasso Tool and select around the eye in full.
- Add a
Curves Adjustment layer by going to the “create adjustment layer” symbol
at the bottom of the Layers Panel (it is a half shaded circle) and click
on curves in the list.
- Use the
curve to raise the lightness of the eyes and lift the catchlights by
giving a little contrast. Remember, the upper part of the curve adjusts
the lighter contrast and the lower part of the curve the darker parts. Only
small adjustments are needed because we don’t want the eyes to look like
headlights. Start by lifting the middle of the Curves line up a little to
give an overall gleam and then adjust in very small parts the lighter or
darker parts.
- Click on
the mask of the Curves Adjustment layer and with a hard brush set to Black
at about 50% opacity go around the rims of the eyes to take off any
overhang caused by the Curves adjustment.
Eye Lashes
If the eyes have mascara applied or where
there are long eye lashes:-
- Expand
image to 100%
- Add a Dodge
and Burn layer as when we did the irises by adding a layer filled with 50%
Gray and set to Soft Light and using the Burn Tool with a brush setting of
6% opacity to darken around the rims to emphasize eye lashes and where
mascara has been applied.
Eye
Shadows (highlight colouring and shading)
Over the eyelids where eye shadow may have
been applied or just to give some shadow emphasis
- Expand
image to 100%
- Add
another Dodge and Burn Layer, again filled with 50% Gray and set to Soft
light
- Take the
Dodge and Burn Tools at an opacity of round 6% dodge and burn the area
above the eyes and below the eye brows to emphasize shade and colouring.
- Further,
by adding another layer and using the Brush Tool with a colour setting of your
choice, at a low opacity setting and a soft brush apply colouring over the
eye shadow area to add or even change colouring.
- Sometimes
I might put a small amount of blur onto the layer to smooth things over by
going to Filter-Blur-Gaussian Blur
Eye Brows
If the eyebrows are untidy
- Expand
the image to 100%
- Take the
Clone Tool set the mode to Lighten, Hardness at around 75% and Opacity at
20% and sampling from the skin closest to the eyebrow tidy the edge and
any stray bits.
- If there
is any uneven thickness of the eyebrow or uneven colouring use the Clone
Tool again switching between Lighten and Darken modes to thicken its
appearance.
There may be other bits depending on the
image such as if the rims of the eyelids show too much redness but this is the
sort of detail, which I believe is necessary if you want to bring out the
strength of the eyes and engage with the viewer.
Please follow this blog for more of my
workflow.
 As a photographer, and in my past in the fashion industry, I have worked closely with model and
entertainment agencies. One aspect of the service I offer is
portfolio production for models and entertainers. We have all seen the type of
photos that models will put forward to promote their work but agencies,
especially the big ones want to also see something presenting the model in
their natural appearance so they may make a raw judgment. In the days before
digital these photos would be often referred to as polaroids because
photographers would use a polaroid camera to avoid the cost of film.
 In my connection with one of the top
agencies in London I search out models with potential and here I have examples
of some polaroid photos submitted already. The models are Julie Aston and
Hayley McKay.


